
Updated: 2026-10-03
Photograph the outdoor-unit location before replacing an air conditioner: five useful views
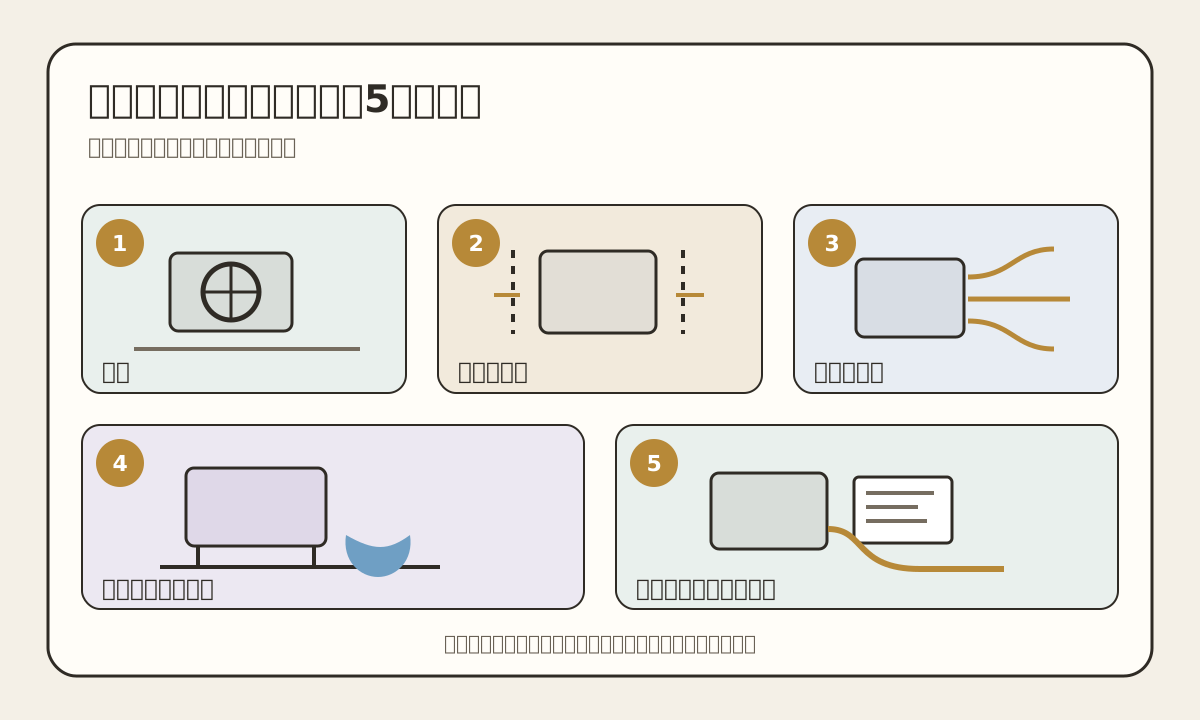
Five safe photos to share before buying a replacement AC: the full location, clearances, discharge path, base and drainage, and the model labels and visible pipe route.
Short Answer
Before buying a replacement, take five sets of photos: the whole outdoor-unit location; the left, right, and rear clearances; the space in front of the discharge; the base, supports, and visible drainage; and both model labels with the visible pipe route. A new outdoor unit may be larger, and required airflow and service space varies by model and obstacle layout. Photos prepare an enquiry; they do not prove that a model fits or that no extra work is needed. Do not step onto a roof, lean outside a balcony, or enter a restricted space for a photo. State what cannot be seen, then use the proposed model's installation instructions and an on-site check for the final decision.
Checklist
- ・Show the complete unit and surrounding location in one wide view
- ・Record side, rear, overhead, and discharge-side obstacles
- ・Show the supports, floor, and visible drainage route
- ・Record both models and the visible pipe route without publishing serial or QR data
- ・Do not enter a roof, ledge, or unsafe narrow space for a photo
Evidence guide
Five outdoor-unit photo groups for a replacement enquiry
Record the airflow, work area, drainage, and visible route from safe positions, not only the cabinet. Photos prepare the enquiry; they do not certify the installation.
Evidence 1
A larger replacement outdoor unit may not fit the current location
Mitsubishi Electric warns that a replacement cabinet may be larger and publishes model-specific space diagrams. Confirm the proposed product dimensions with site measurements rather than a photo estimate alone.
Mitsubishi Electric: choosing and installing an AC (Japanese)Evidence 2
Airflow paths depend on the obstacle layout and product criteria
Panasonic advises keeping multiple directions open around the outdoor unit for heat rejection. This is Panasonic's selection guidance and does not set universal dimensions for every product.
Panasonic: outdoor-unit installation space (Japanese)Evidence 3
Use the exact installation manual for supports and drainage
One Mitsubishi Electric model manual illustrates drain slope and raising the unit where drainage clearance is needed. Photos communicate the site; they do not turn one model's instructions into a universal method.
Mitsubishi Electric: room AC installation manual (Japanese PDF)Evidence 4
Final work follows the manufacturer's installation instructions
JRAIA tells installers to perform installation in accordance with the installation manual. The photo checklist is purchasing preparation, not a replacement for qualified work or an on-site check.
JRAIA: installation safety guidance (Japanese)Official materials checked: 2026-10-03. Apply the instructions for the exact model and site.
A current outdoor unit fitting does not prove that the replacement will fit
Outdoor-unit width, height, and depth vary by capacity and series. Mitsubishi Electric warns that a replacement outdoor unit can be larger than the existing one and may not fit, and it publishes model-specific clearance diagrams. Start with the proposed model's dimensions and installation-space requirements. Include walls, rails, windows, piping, and neighboring equipment in the photos. A ruler in a photo or a visual estimate does not replace site measurement and the exact installation manual.
Photo one: the complete location from a safe distance
From a safe standing position, frame the complete outdoor unit, floor or balcony, overhead cover, side walls, and railings. Show whether it is ground-mounted, stacked, suspended, wall-mounted, or roof-mounted. For replacement work, a photo before removal preserves the current position and pipe entry. It does not prove that a support can be reused or that the job falls within a basic installation price.
Photo two: each safely accessible side and the rear clearance
When access is safe, photograph both sides to show wall clearance, pipe and cable entry, and possible service access. Panasonic calls for an open airflow path around the outdoor unit, while Mitsubishi Electric publishes dimensions that vary by series and obstacle arrangement. The number of photos in this guide is not an installation specification. Do not squeeze into a narrow gap or push a phone behind the unit.
Photo three: the discharge and everything in front of it
Frame the discharge grille together with railings, walls, storage, plants, or another outdoor unit in front. Mitsubishi Electric explains that discharged air returning to the intake can create short cycling and interfere with efficient operation. The required distance depends on the proposed model, obstacle height, and open directions. Do not approach a running fan or remove a cover to improve the view.
Photo four: supports, floor, and the visible drainage destination
Show the unit feet, blocks or frame, floor surface, and nearby drain or water marks. Heating-operation drainage and rainwater handling depend on the product and site. One Mitsubishi Electric installation manual, for example, specifies drainage slope and raising the unit when drainage clearance is needed; those details are not universal dimensions. Photos do not prove the strength, level, or fastening of a roof, wall, balcony, or support.
Photo five: both model labels and the visible pipe route
Take separate readable photos of the indoor- and outdoor-unit model labels, then record the wall opening, trunking, outside exit, and visible route to the outdoor unit. If a replacement is shortlisted, send its exact model or official product page. Share serial numbers and label QR codes only when needed with the provider rather than posting them publicly. Describe concealed, high, or shared-space sections as not safely visible instead of guessing.
Separate what photos can prepare from what requires a site check
Photos can communicate the mounting style, obstacles, visible route, model, and broad working area. They cannot confirm structural strength, exact dimensions, concealed piping, drainage fall, carrying access, electrical work, extra materials, or the final price. JRAIA says installation work should follow the manufacturer's installation instructions. Send the proposed model and the five photo groups before purchase, then identify what still needs an on-site check and what the estimate includes.
Discussing an outdoor-unit location for replacement in Nagoya
Our air-conditioner installation starts from ¥26,000, including tax. This is a current starting price, not a flat total covering removal, new or reused supports, extra piping, high access, carrying access, or electrical work. Send the proposed model and photos of the full location, clearances, discharge, base, and visible route. Dimensions and structural conditions that cannot be confirmed from photos are checked on site, and the required scope and total are explained before work begins.
References
- Panasonic: outdoor-unit location and airflow path (Japanese)
- Mitsubishi Electric: outdoor-unit size, clearance, and short-cycling guidance (Japanese)
- Mitsubishi Electric: model-specific installation and drainage instructions (Japanese PDF)
- JRAIA: safety guidance to follow the manufacturer's installation instructions (Japanese)
Need help with the actual work?
Photos and a short description help us understand what work may be needed.